Friday, June 27, 2014

MAC Sharon & Kelly Osbourne Collection Picks


MAC recently launched a collaboration with Kelly & Sharon Osbourne.  The mother-daughter duo each have their own collection of 11 products which include lipsticks, blushes, eye shadow quads, liners and glosses. Kelly's line features violet packaging and Sharon's is bright red modeled after their vibrant hair colors. Here is what I picked up:


Cheeky Bugger Blush (Kelly Collection)

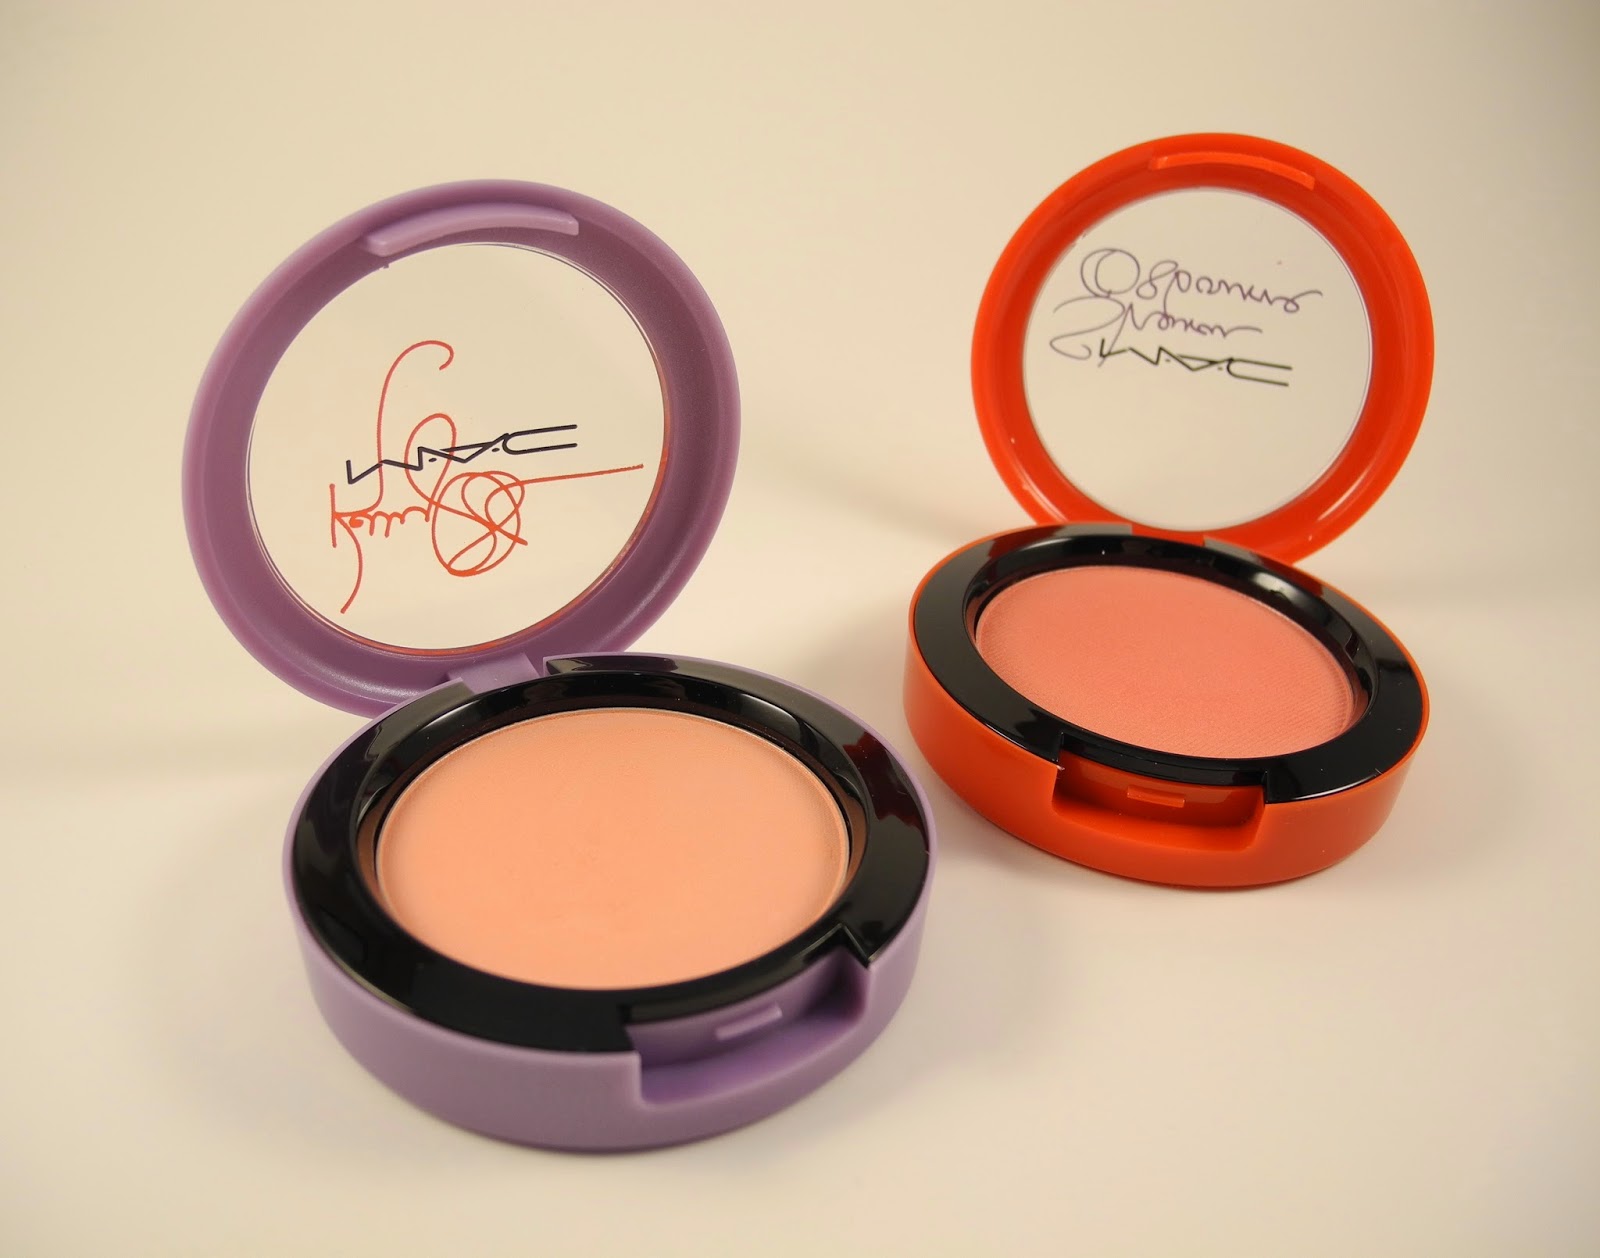
MAC describes this blush as peach brown with a satin finish. I'm not a fan of how they described it because I don't see any brown in this color. It is a nice pale pink with a yellow undertone.  It gives my cheeks a beautiful, natural rosy glow. Due to the light nature of this pink, it will show up more true to color on paler skin tones.  My only complaint with this blush was that it was a bit powdery when picking it up with a brush but it did end up blending out nicely into my skin.


Peaches & Cream Blush (Sharon Collection)

MAC describes this blush as a mid-tone rose color with a satin finish.  The satin finish gives it a nice subtle sheen, which radiates a natural looking "summer glow" on your cheeks. The color was very pigmented and blended nicely. A perfect everyday blush.


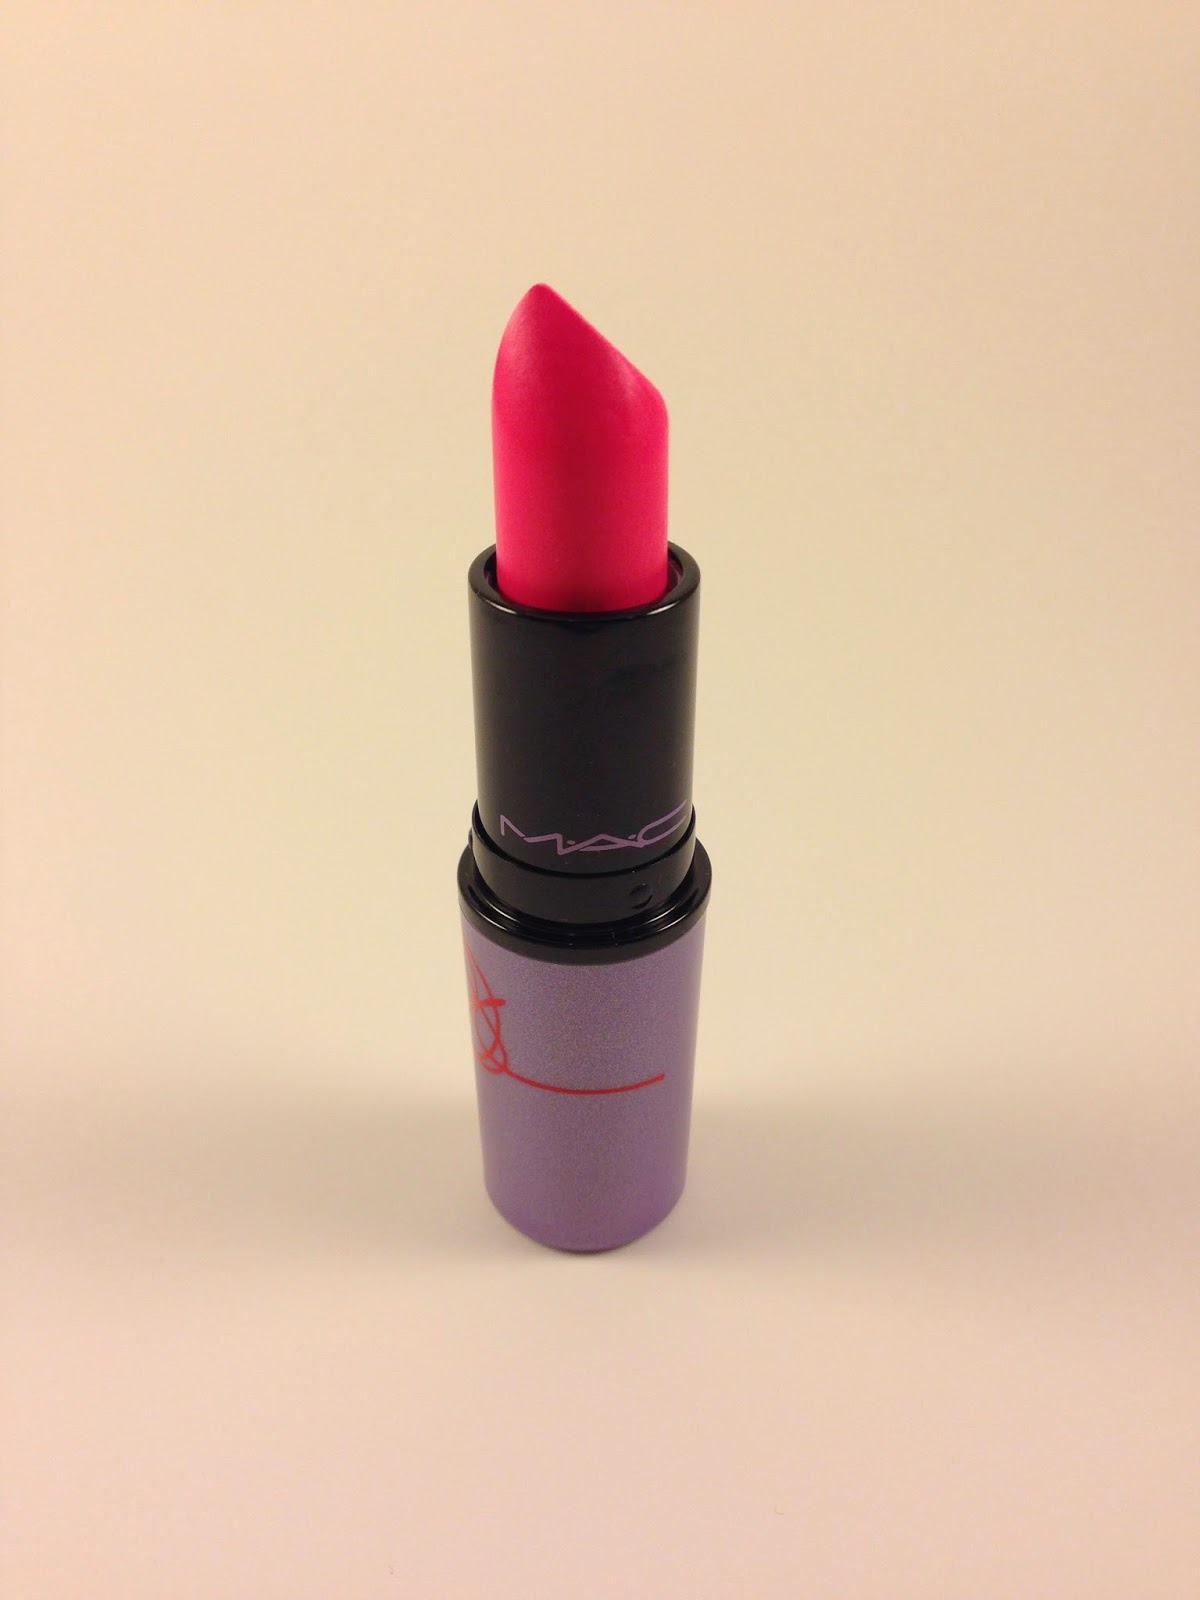
Kelly Yum Yum Lipstick (Kelly Collection)

This is a satin version of the ever popular, Candy Yum Yum lipstick. Candy Yum Yum is matte and more cool toned while Kelly Yum Yum is slightly warmer and pinker.  I chose this shade because I've always wanted Candy Yum Yum but was a bit scared of the electric color and matte finish.  I think Kelly Yum Yum is a more wearable version. The color can easily be sheered out by layering it on top of a lip balm or by lightly dabbing it onto your lips. The satin finish is also more comfortable to wear.


Final Thoughts

Unfortunately all of these items are now sold out on the MAC website but I was able to find them in-store. With the limited edition MAC collections I always have better luck finding them at a counter than I do trying to buy them off the website. Overall I am happy with my picks.  Did you purchase anything from the Kelly & Sharon Osbourne collections?


Tuesday, June 17, 2014

Nailed It! OPI Damone Roberts 1968


I wanted to do a quick post about OPI's highly sought out shade, Damone Roberts 1968.  To be honest I didn't know about this shade until I saw a few posts from some of the nail blogs I follow.  From what I gather, this shade was from a limited edition collection by Damone Roberts, of eyebrow shaping fame. He created his own signature shade that mirrors the green color of the walls in his salons.


(natural light)


(shade)


The color is absolutely gorgeous! At first I want to call it mint green, but it is unlike any of the other mints I own.  It is darker, greener, but still soft and pastel.  I think the best way to describe it is pistachio green.


This is a true creme formula, no shimmer at all. The formula is slightly streaky due to the pastel nature of the color, but I actually got away with only two coats.  The pigmentation was great and formula was thin. Sometimes with pastels they try to amp up the pigmentation which results in a goopy formula.  Not the case here!


Of course, this is limited edition again. It was first released back in 2009, then re-released in 2010 and now its coming back for the last time this summer. I picked up my bottle during the pre-sale but the regular sale begins this Friday, June 20th, on his website and in his salons.

Bottom line, if you love green nail polish and don't mind the inflated price tag (regular OPI polish is $9, this is $20) this is the creme de la creme! Check out this fan favorite before its gone! http://store.damoneroberts.com/


Thursday, June 12, 2014

Let them (finally) eat cake!

To piggyback on last week's post, last Wednesday was our third wedding anniversary.  When planning our wedding one of our favorite things we designed was our wedding cake! Since we were doing a Cape Cod theme I knew I wanted to incorporate that into the cake.  

We settled on a four tiered cake with White Buttercream icing and a Swiss Dot pattern allover. We incorporated the Cape Cod theme by adding bouquets of candy shells and topped the cake with two Adirondack chairs. I just love the way it turned out!  Two of the tiers were Chocolate Torte - Chocolate Cake with Chocolate Mousse filling and two were Lemon Citron - Gold Cake with Lemon Mousse.  The bakery we used was Konditor Meister in Braintree, MA.


We were so excited to try a piece of this masterpiece during the reception.  Problem was, we were socializing with our guests when the cake was served and our pieces were cleared by the time we got back to the table! The horror!

We had the venue save the top tier of our cake so we figured no big deal, we'll get to have some on our first anniversary.  This didn't work out so well either.  Turns out that thawed, 1 year old cake isn't the most appetizing desert.  This tradition is really more ceremonial than anything.  We each took a bite and that was it, kind of a letdown.

The lack of wedding cake on our wedding and our first anniversary seemed to come up in conversation a lot between us as the years went by.  Mike is a big dessert lover and he was especially irked that he didn't get to enjoy any cake.  So for our third anniversary I decided to have Konditor Meister recreate the top tier of our cake.


I had them do the Chocolate Torte filling but skipped the shells this time. It didn't really make sense for just the single tier.


I also got a bottle of champagne and broke out our Mr. & Mrs. champagne flutes.  Mike was really surprised and loved the cake.  I even dug out our cake toppers and threw them on for the big reveal. I have to say it was worth the wait.  The cake was to die for, so moist and delicious!

We are going away to celebrate both our birthdays and our anniversary coming up so on our actually anniversary we had a nice night in cooking dinner, eating cake and watching our new favorite show, Fargo. Mike loves the movie and forced me to watch the show, but I have to say I'm really into it. I can't believe next week is the finale! I'm wondering if it will only be this one season or if its going to come back next year? I guess I'll knew more next week!


Wednesday, June 4, 2014

Three Years

Today marks our third wedding anniversary! Its hard to believe its been three years since Mike and I said said "I Do"! In honor of that I thought I'd share some of our wedding photos and look back on our special day.

Mike and I got engaged in August 2009 and then immediately started planning our wedding.  We've always shared a love of the beach and travel.  We knew we wanted to do a destination wedding but we wanted to be able to have all our friends and family present to share the day with us.  We decided that Cape Cod was the perfect location.  We chose the Cape Codder Resort as our venue and decided to do a beach ceremony at Keyes Memorial Beach in Hyannis.

Once we settled on the date of June 4, 2011 and booked our venue, it at first seemed like we had all the time in the world, but before we knew it the big day was here! On the day of I was both nervous and excited. I spent the morning with my bridesmaids and family getting ready and relaxing before the ceremony. It was important to me to enjoy that time and not spend it stressing. I had to trust that all of our careful planning would pay off.


We planned every detail of the wedding and added many DIY and personal touches.  We made personalized dress hangers for the bridal party, a friend handmade all of the wedding party's jewelry and my sister designed and crafted our wedding invitations.  Our colors were sage green and periwinkle blue to compliment the spring landscape of the Cape with all the beautiful Hydrangeas.  We also incorporated our love of the beach into our reception.  We created sand dollar escort cards and named the tables after all our favorite beaches on the Cape.  Our cake was covered in shells and topped with two adirondack chairs.


We were so lucky to have an absolutely beautiful day for our wedding.  The beach ceremony was perfect.  We said our vows looking out into the ocean with the waves crashing in front of us.  We had an acoustic guitarist play some of our favorite beach tunes and love songs as the guests arrived and as I walked down the aisle.  We did a sand ceremony where we each took a handful of sand from the beach and poured it into a glass vase to symbolize the melding of our two lives.  


The reception was a blast.  The Cape Codder provided a delicious four course meal and we danced all night under the twinkle lights of the JFK ballroom.  It was such a perfect day filled with love, laughter and the support of our amazing friends and family. 


Photography Shoreshotz Weddings


Tuesday, June 3, 2014

Lip Scrub Three Easy Ways

If you are a lipstick lover like me, making sure you lips are soft and flake-free is a must.  An easy way to care for your lips is to exfoliate them with a lip scrub.  I unfortunately suffer from chapped lips year-round. Sometimes all the lip balm in the world doesn't help and the only remedy is to fix the problem by sloughing away the top layer of dead skin.  Here are three easy ways to reclaim your soft lips:


DIY Olive Oil & Sugar Lip Scrub

This is an easy scrub you can make at home with ingredients you probably already have on hand.


What you'll need:

1 Tbsp Olive Oil
1 Tbsp White Sugar


To make, simply mix the two ingredients until well combined.  Consistency will be paste-like.  You can add more sugar if you want a grainier scrub. 

Apply a dollop of the scrub onto your lips and massage in small circular motions.  I don't have a set time that I scrub for, I'd say its usually 30 seconds - 1 minute, then I remove it with a damp face cloth.  

You can store the extra mixture in the fridge for about a week.  After that time the scrub starts to get a bit hard but you can rejuvenate it by adding a little more oil and re-mixing.


DIY Lip Balm & Sugar Scrub


If you want to go the even easier route, all you need is your favorite lip balm and some white sugar.


Here I'm using Rosebud Salve, you can even use Vaseline.  Just dip your finger into the product then dip it into some sugar to coat the lip balm.

Same idea here as in the olive oil scrub.  Dab this on your lips and massage in circular motions.  Wipe your lips clean with a damp face cloth.


E.L.F. Lip Exfoliator

Although I love the first two DIY scrub methods, sometimes when I'm in a rush or just don't want to have any sort of clean up I reach for this pre-made lip exfoliator by E.L.F.


You can buy this at Target and its a steal for just $3! To use you simply twist it up and apply it straight from the tube to your lips.  I use the same small circular motions to scrub and then remove it with a damp face cloth. My only complaint with this is that the tube tends to try out. I need to warm it up on my hand for a second to get it going again before I apply it.


Final Thoughts:

My favorite method is the Olive Oil & Sugar scrub because I feel that its the most nourishing and leaves my lips feeling moisturized once the scrub is removed.  

I like to do lip scrubs at night and then follow-up with a lip balm to lock in moisturize.  If you are doing this in the morning, just apply your favorite lip product after cleaning up and you're good to go!

I hope these ideas helped you to exfoliate your lips to make them soft, supple and lipstick ready!